


Wiring Solar Panels
#rvlife #travel #solar #offgrid
2021-05-13
I am so excited that the last step to our solar panel and battery upgrade has come - wiring in the solar panels. This project will mean that we can dry camp or boondock for longer periods of time without having to worry about draining our batteries. Installing the solar panels themselves was easy enough, but they won’t do anything unless we wire them into our lithium battery system. But where do the wires go?
Where to run RV solar panel wires
My (Mel) only requirement for the solar panel wires was that the wires are hidden inside the RV. To me, there is nothing worse than a bunch of dangling wires all over the place. I like my technology tidy and it’s wires out of sight. Can you relate?

That meant Jay had to get a little creative. We agreed that hiding the wires behind a corner joint in the kitchen would be fine. That way, it would feed straight from the roof down to under the kitchen counter where the batteries are located in the shortest distance possible.
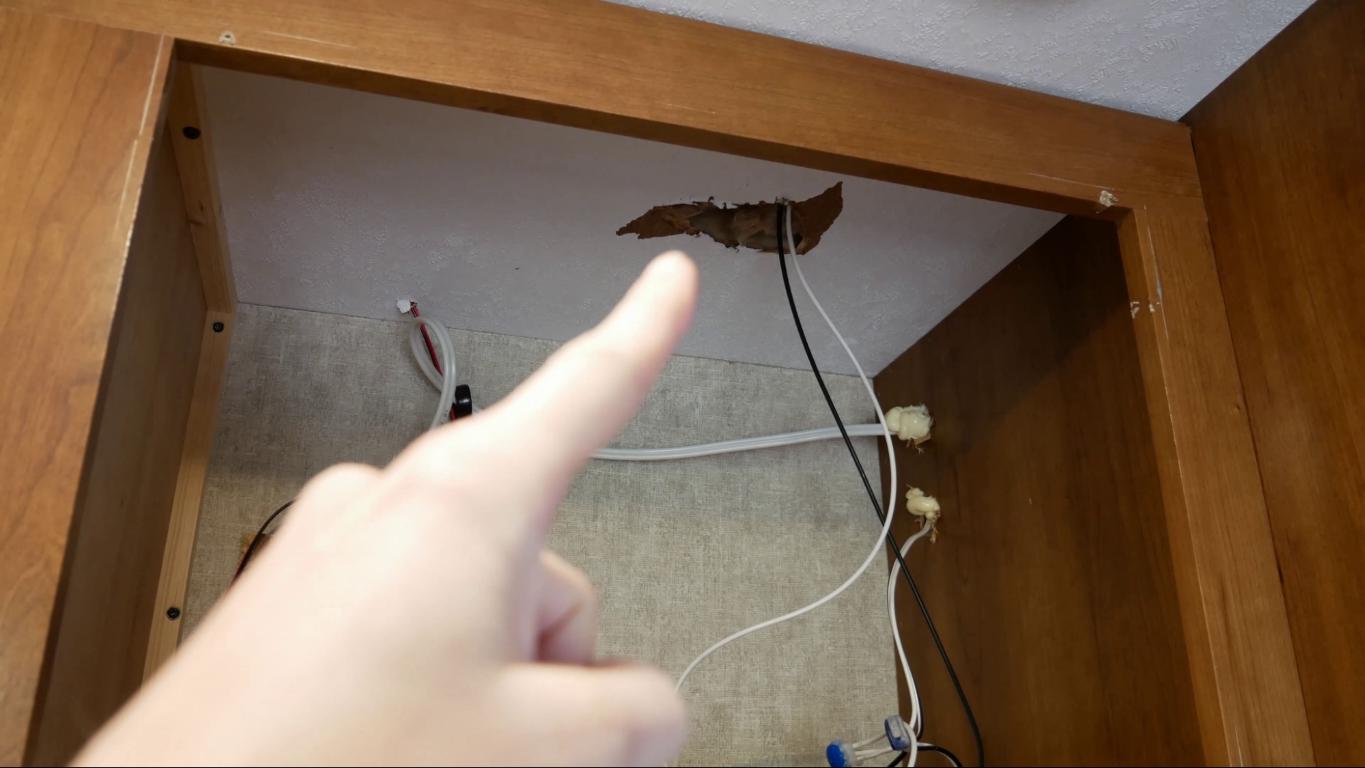
The first thing he did was remove the microwave to see if he could feed the wires through the roof and behind the microwave. There was already a hole in the ceiling behind the microwave (not made by us), which was promising for making this work. However, after removing the corner cover, he realized that the wires were too thick to be concealed behind it. Now what?
Luckily there were already some (more) holes behind the microwave that went into the side wall and Jay found out that the space is pretty accessible from behind the fridge panel on the outside of the RV. This way, the wires could be fed through the wall with less drilling than originally planned and the solar panel wires would be completely hidden! Perfect!
Running our RV solar panel wires
To recap, our plan was to run the solar panel wires from the roof, through the roof to the space behind the microwave, then into the wall between the stove and fridge to under the kitchen counter/stove area where the batteries are located.
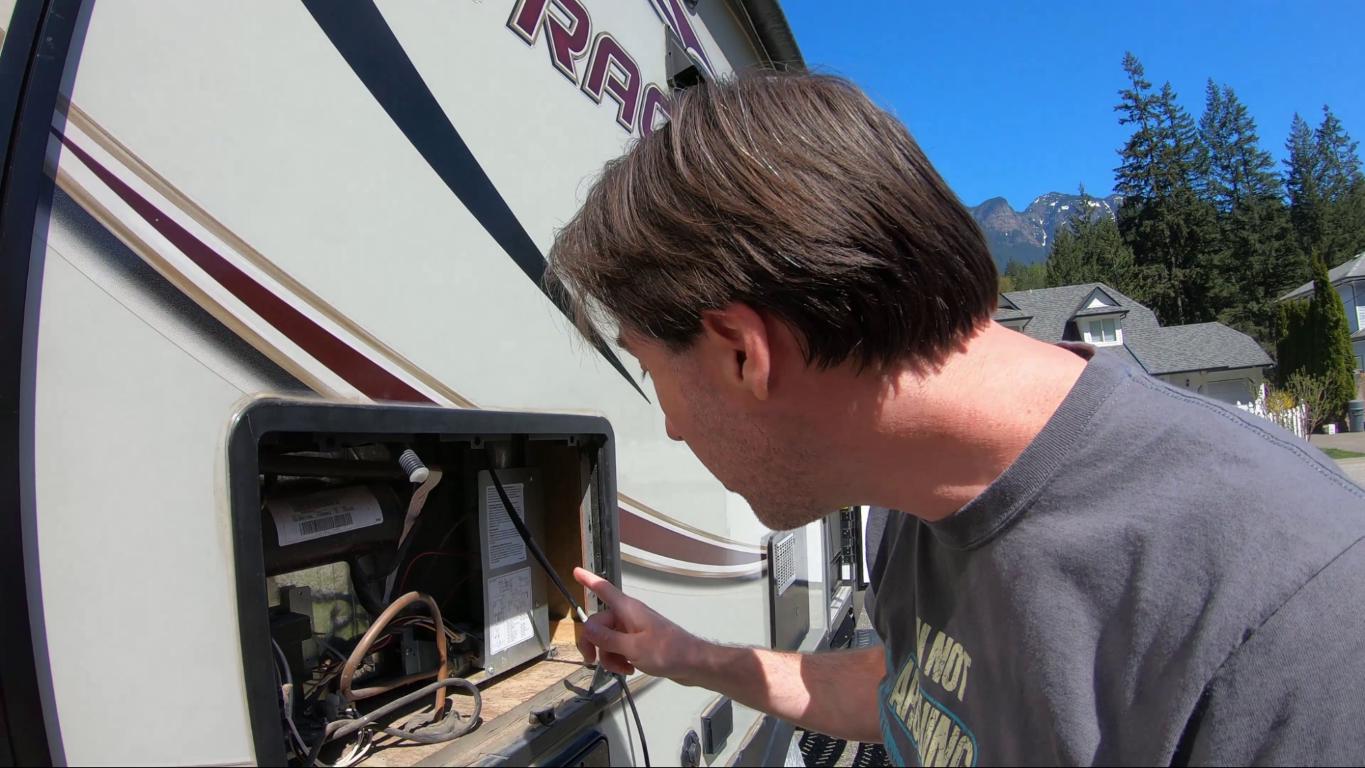
Now that we knew the path the wires were going to take, it was all just a matter of drilling the holes and feeding the wires through. The scariest part of running the solar panel wiring is drilling a hole through the top of the trailer, down into the trailer. Jay used a drill, drill bits corresponding to the gauze of the wires, some dicor lap sealant to waterproof everything once the cover was put on top of it, and of course the wires.

The moment of truth arrived and he drilled the first hole...right through the support beam, missing the existing hole by about an inch! Not to worry, we had two wires to run which meant that he got to try again, which was perfect and right through the existing hole (again not created by us). The wires ran through the holes perfectly and he was able to temporarily connect them into the system for testing.
Before losing the sun behind the trees Jay did a quick test just to make sure the wires were working properly. He made sure everything was disconnected in the trailer so that only the solar panels would be feeding the system. The positive wire was on a circuit breaker so he could switch it on and off to test out the voltages.

Unfortunately, the panel that was wired up was partially shaded and it was not reading at it’s full 100 watt capacity, but it was still giving us a reading which meant it was working and that was good enough for us to move ahead with wiring in the other 3 panels.
Once all of the panels were connected, and the system was tested one more time, Jay was happy to cap off the wires and add the waterproof dicor sealant. There is no going back from this point, so it’s a good idea to make sure everything is the way it should be. Ok, maybe with great expense and time you could redo things, but who wants to deal with that?
Tilting solar panels
We've seen a lot of online debate about whether tilting the panels is actually worth it. When we installed our solar panels, it was mid-April in southern British Columbia, Canada and the sun was at about 45 degrees. Tilting the panels 45 degrees towards the sun doubled the output, so we think it is actually worth it to have our panels tilt-able for those off-season months.

Benefit of RV solar panels
One really cool thing about having the solar is we don't have to plug the trailer in anymore. Before we had solar panels on the RV we had to plug in just to keep our battery topped up all the time, but now it tops itself up from the sun. It's great, and we don't have a cord running from the garage to the RV now (can you say tripping hazard?).
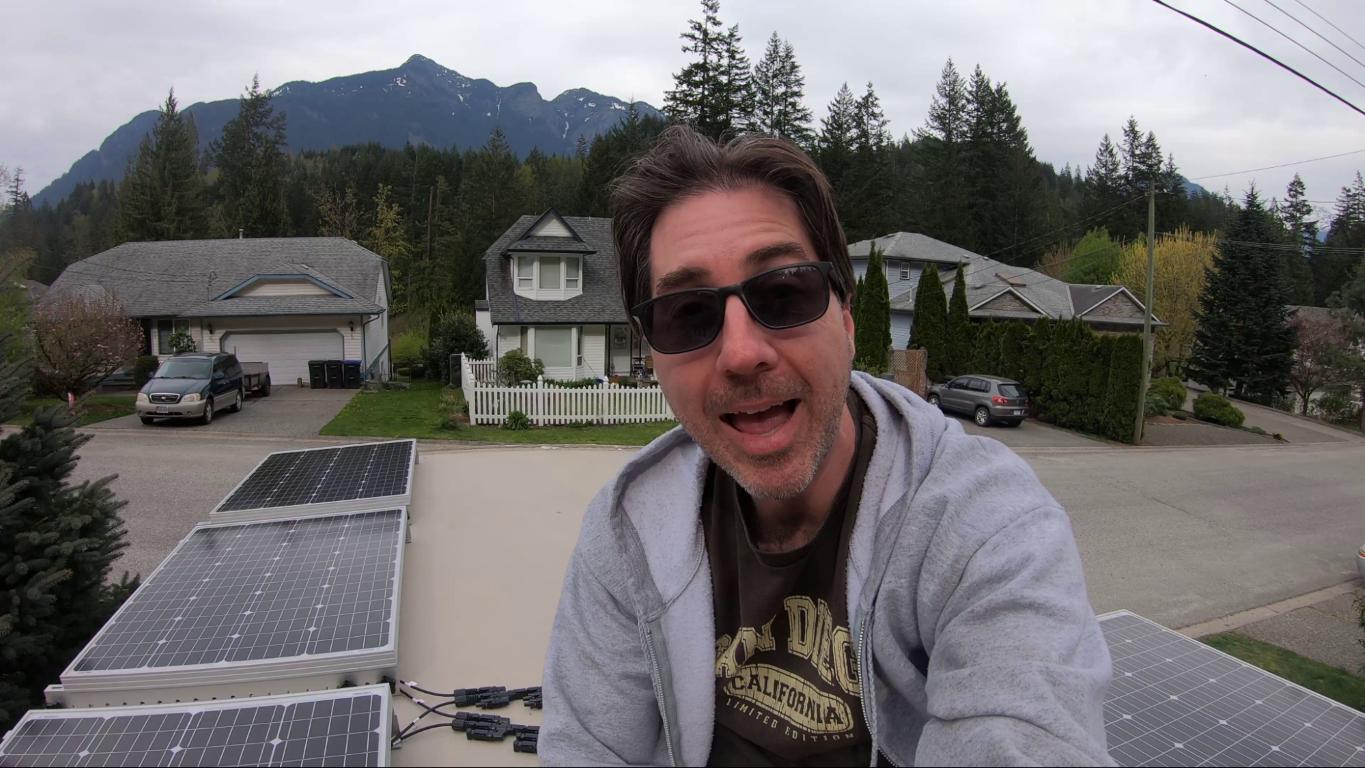
Our solar project is now 100% complete and working. We’re super happy with how it all turned out. It's all Renogy branded stuff, and everything we got worked. Jay is really happy with how the charge controller is working now that the solar panels are hooked up. I’m really happy that we can, essentially, go out dry camping/boondocking without worrying about running out of energy. We have more information, including the circuit diagram and cost overview, about the components we used in our upgrade on our post called RV lithium battery upgrade/conversion for newbies .
Until next time, keep on living the life you’ve imagined!
Mel, Jay & Benny