


RV Bathroom Sink Faucet Replacement
#rvlife #travel #upgrde #faucet
2021-04-22
Easy RV renovation project
Replacing the bathroom sink faucet in an RV is a great beginner RV renovation project. I wish I had known that before tackling some of the other projects I’ve done, like replacing the RV shower head & faucet or reupholstering the RV dinette cushions. Replacing the RV shower head and faucet was also easy, but not nearly as easy as the RV bathroom sink upgrade I did in about ten minutes or less.
9 easy steps to install a new RV bathroom sink faucet
Here are the steps to get this project done fast:
- Access under the sink - I found it easiest to remove the panel that hides the water lines by unscrewing it out of place.
- Turn off the water supply, water pump, and open the faucet to drain any water and pressure left in the water lines.
- Gently unscrew the red and blue water lines from the existing faucet - for extra caution I also put a towel down in case of any extra drips.
- Unscrew the washers on the existing faucet from the countertop and remove.
- Put the new faucet into place and attach the washers to hold it in place.
- Reattach the water lines making sure to attach the hot (red) to the hot side and cold (blue) to the cold side. Be careful not to overtighten these as it could cause leaking.
- Take a breath, you’re almost there!
- Now turn the water or water pump on, open the faucet and watch for leaking around the water line connections for about 1 minute. If there is leaking, jump to the troubleshooting section before continuing on. If there are no leaks, continue to step 9.
- Secure the panel that hides the water lines back in place.
- You’re done! Congratulations you have a new RV bathroom sink faucet!
New RV bathroom sink faucet is leaking
Ok, if you’re reading this you have likely gotten to step eight above, turned on the water again and the faucet is leaking at the water line connections. Don’t worry, if the last faucet wasn’t leaking, then it’s likely that the water lines on the new faucet have just been under tightened or overtightened and this is an easy fix.
If you aren’t sure which has happened, my best recommendation would be to turn off the water, drain the water from the lines by opening the faucet again (like in step 2 above) and try reconnecting the water lines until hand tight then just a bit more (no more than ¼ turn). Then, pressure test the system again starting at step 8 above.
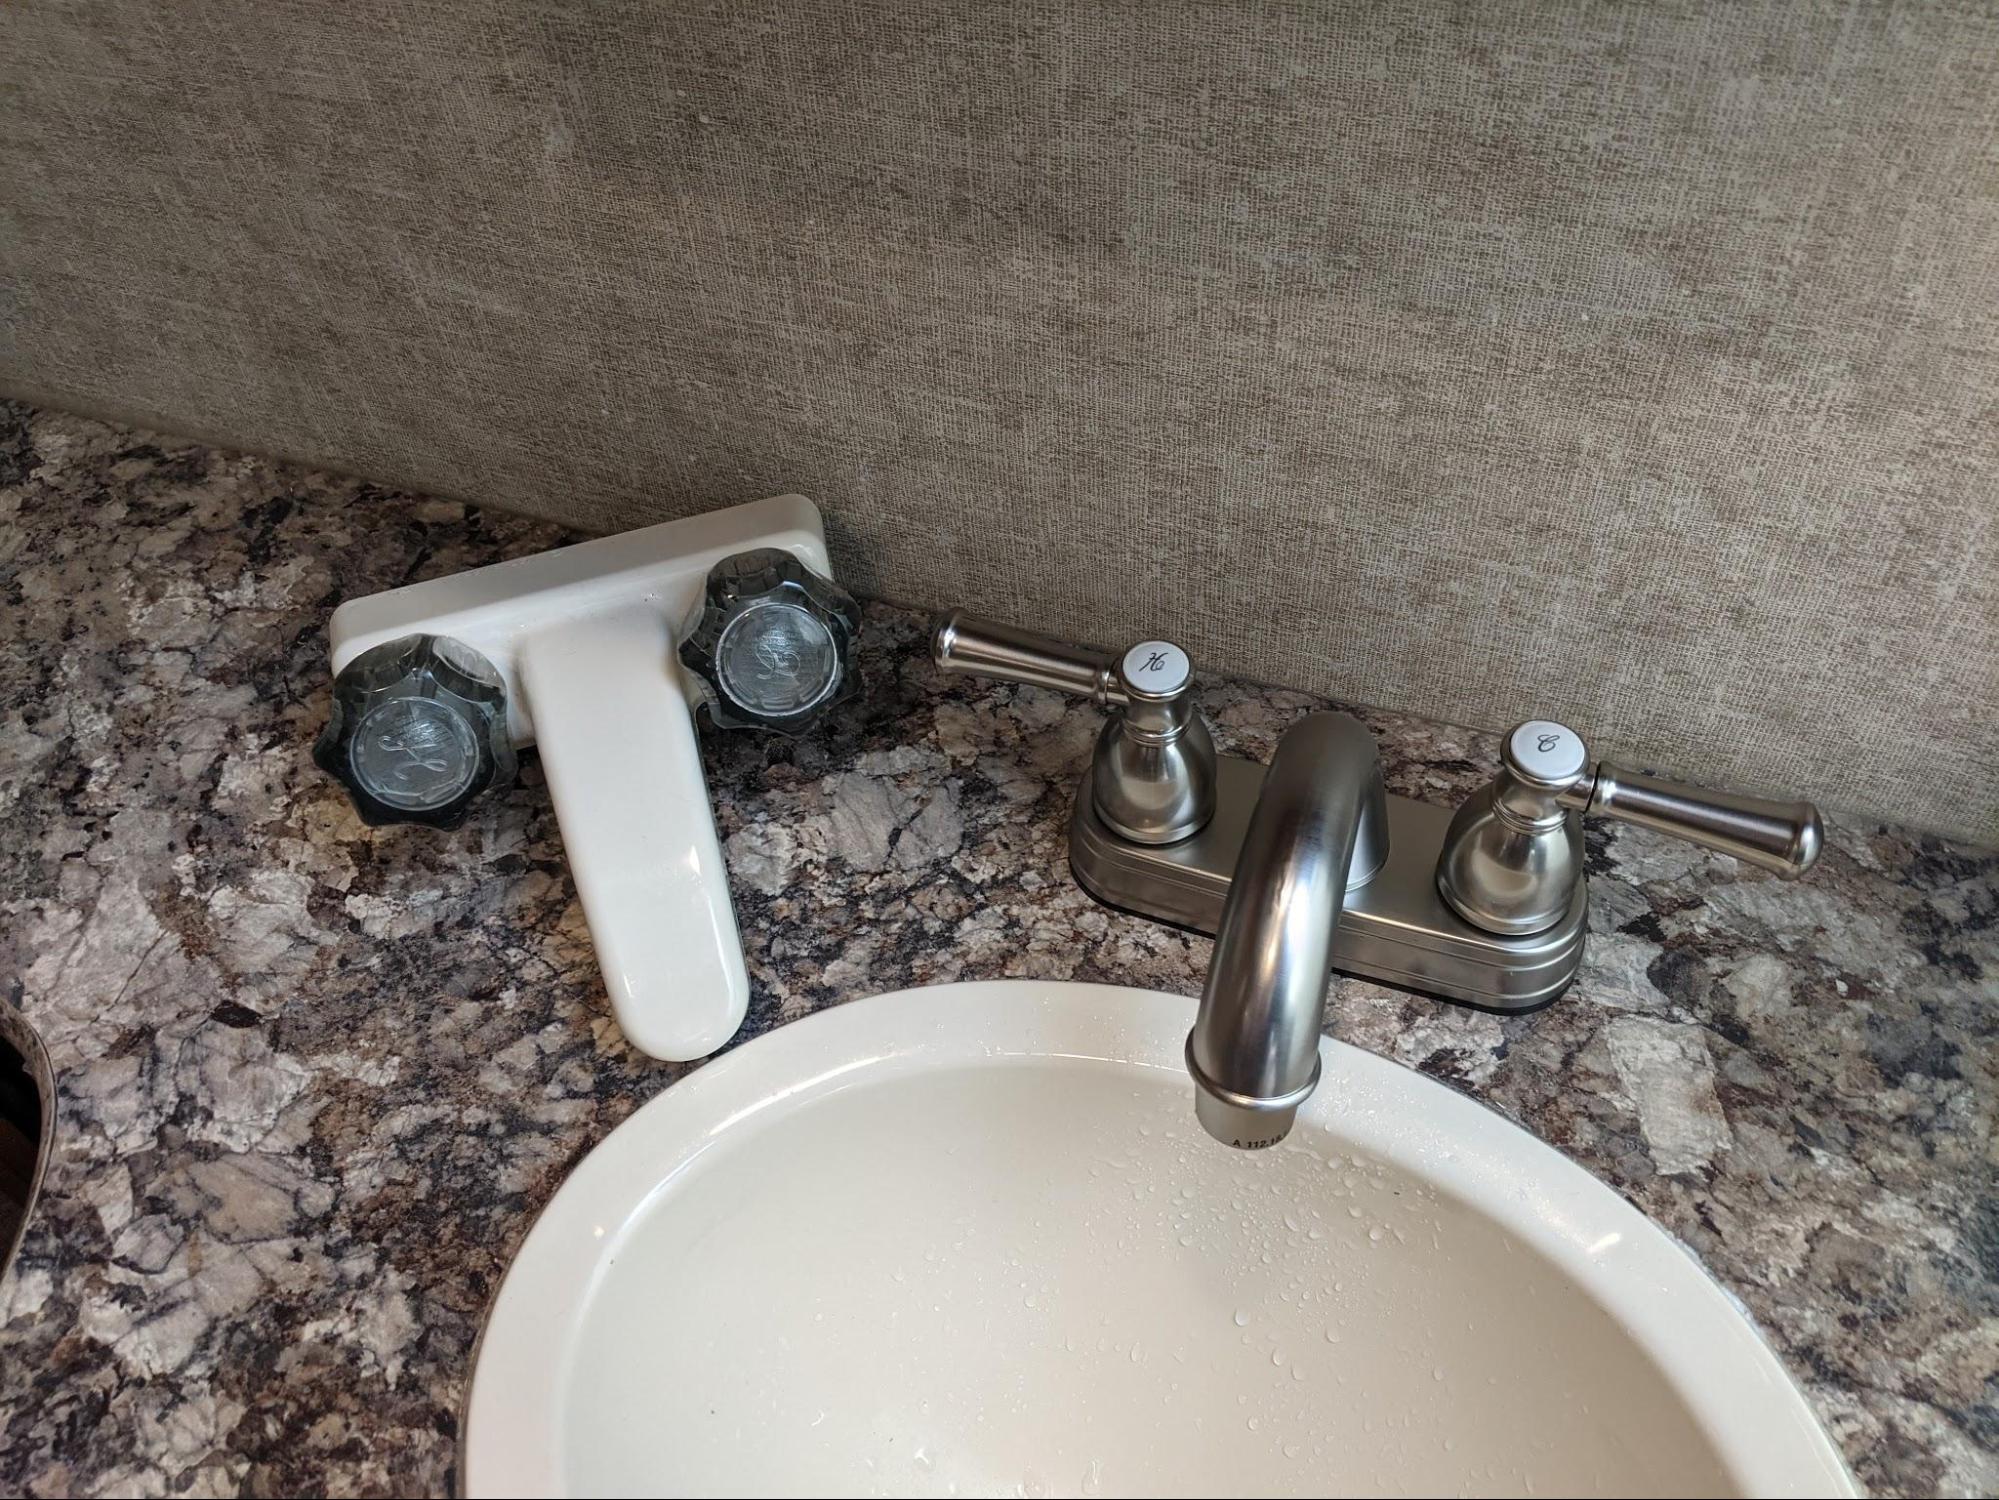
We really love the new look this faucet gives the space. We chose this particular Dura Faucet designer series faucet because of the arched spout that gives us a bit more space in the sink when washing our hands. I think the brushed nickel finish adds a nicer & fancier feel to the bathroom, too. We’ll continue to test this out and have a full review coming soon.
Until next time, keep on living the life you’ve imagined!
Mel, Jay & Benny