


RV shower head & faucet upgrade
#rvlife #travel #shower #upgrade
2021-04-15
It’s easier than you think
This week was my week to channel my (Mel’s) inner plumber. I can’t say that I have ever done any plumbing before, but after watching a video by another RV Youtuber (RV Blogger) I was convinced that I could replace our RV shower head and faucet. I would be doing my Papa proud as he is a plumber by trade. So I donned my blue coveralls, tied back my hair and got to work.
Tools needed to replace RV shower faucet
I was surprised at how few tools I actually needed for this job:
|
|
|
|
|
|
|
|
With my handy tool belt I was ready to tackle and conquer the RV shower faucet upgrade.
How to replace RV shower faucet
The first step was to turn off the water pump and drain any water and pressure in the water lines. This is really important to prevent water spraying in your face, or worse into the wall behind the faucet.
Once that was done, I covered the drain and even plugged the sink drain just in case I dropped something...which I did.
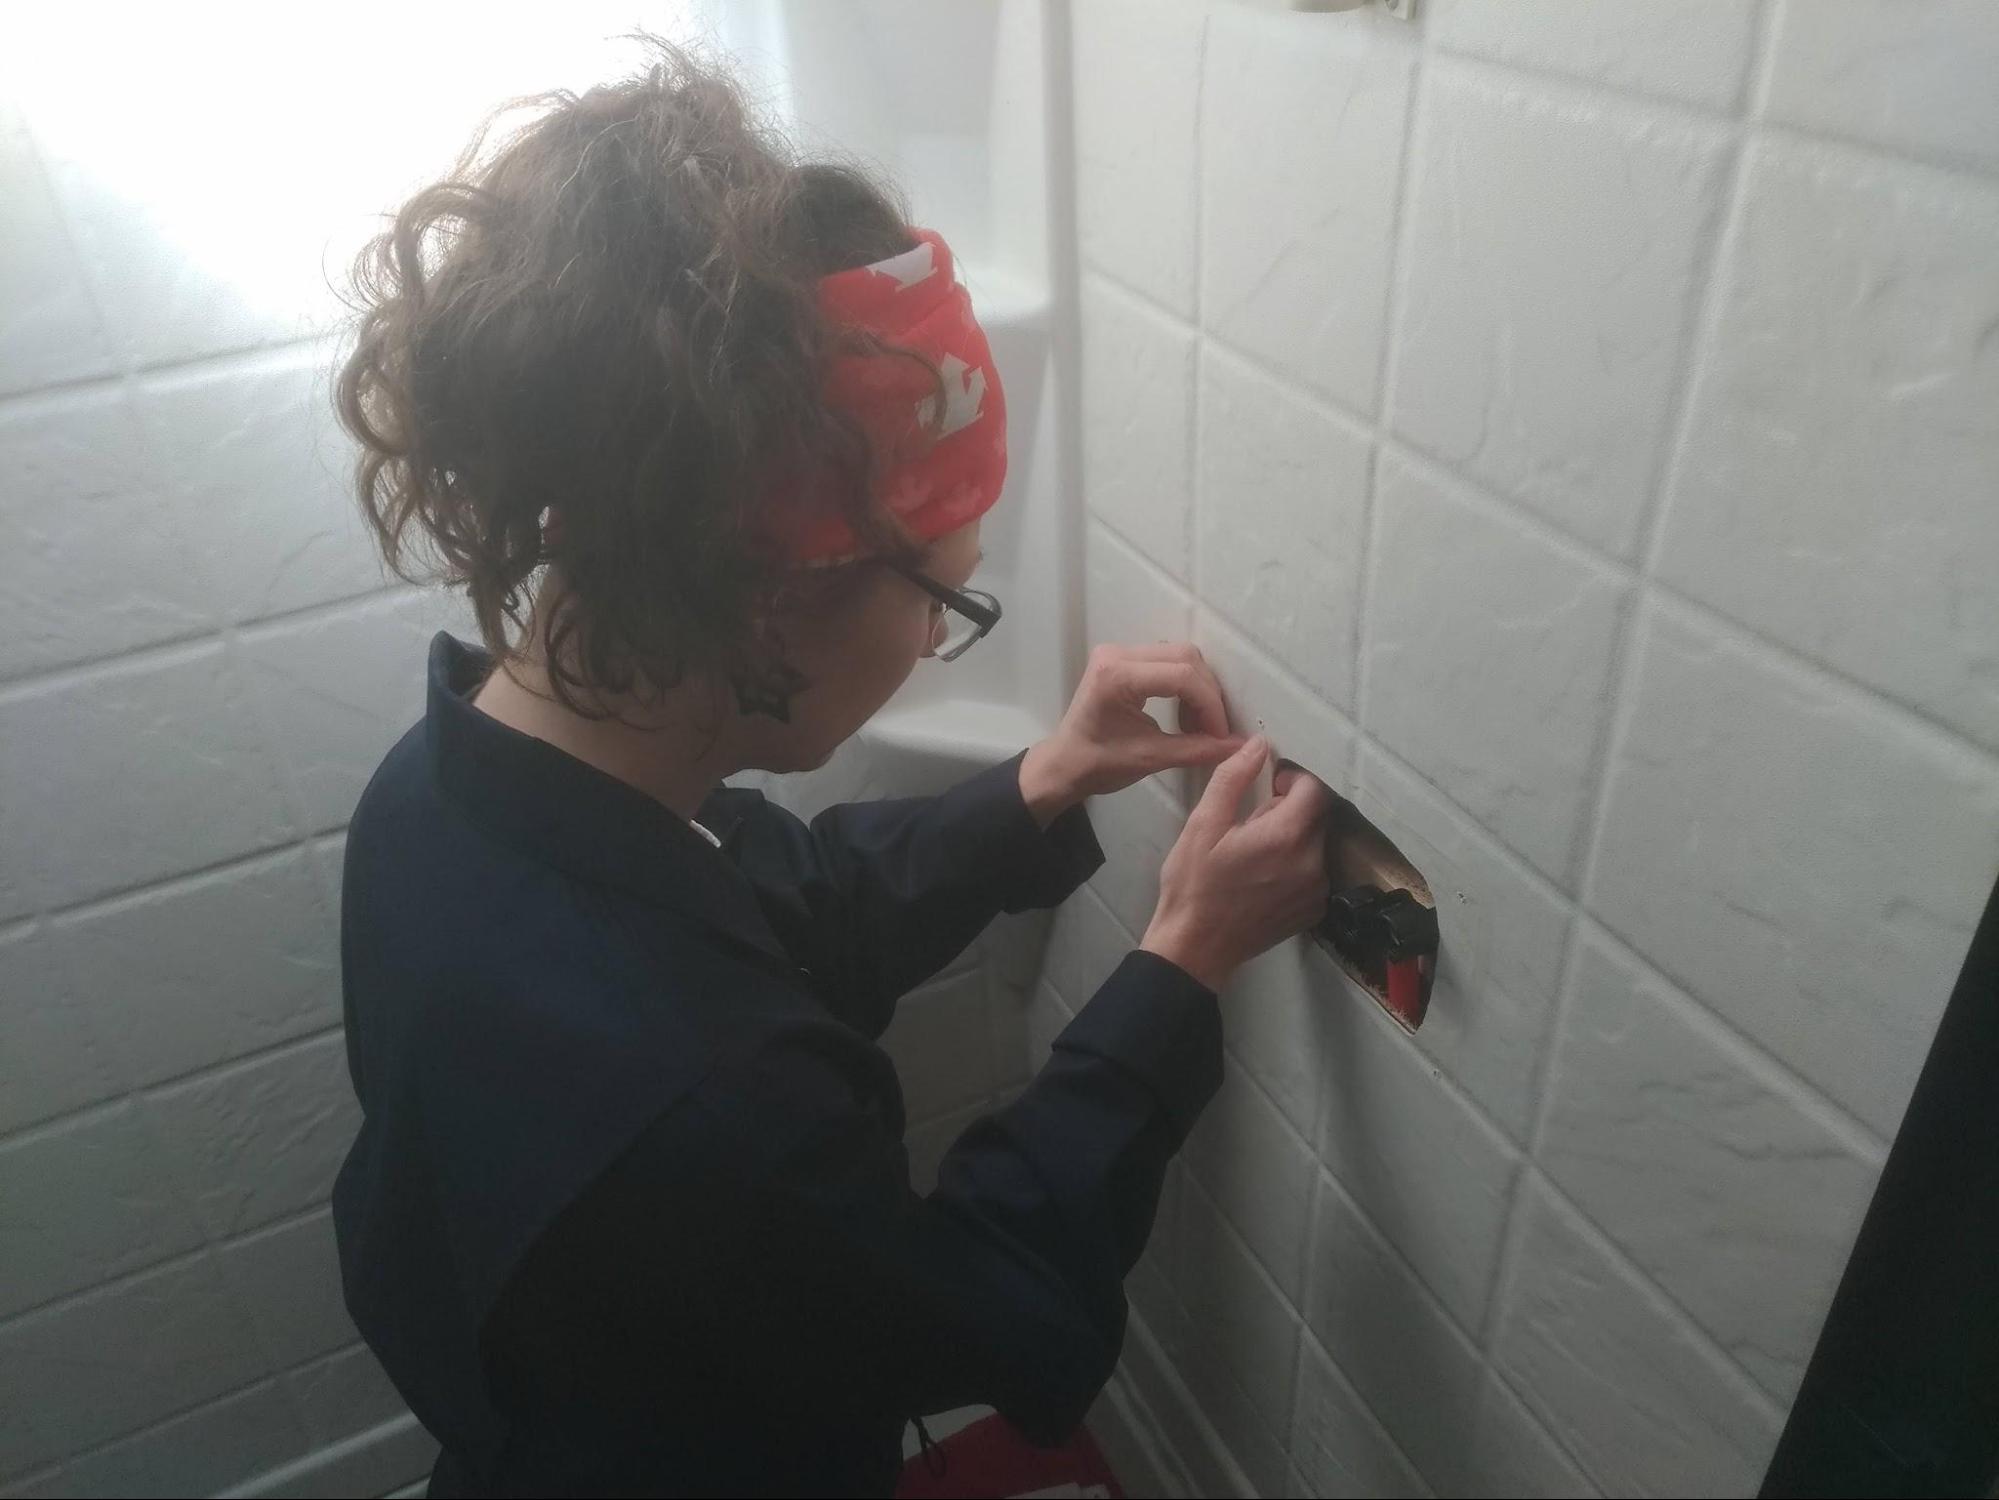
Then, I removed the old shower faucet. This was done by carefully cutting the caulking with my exacto knife, unscrewing the 4 screws on the mounting bracket and gently pulling it away from the wall. It’s important to note that the water lines that are still attached to the faucet don’t always have a lot of slack or flexibility to them, so do this step gently so that they aren’t snapped off.
I was then able to unscrew the water lines from the faucet and remove the faucet from the mounting bracket. Knowing which water line is for cold and which for hot is easy. The red line will connect to the hot tap (on the left) and the blue line to the cold tap (on the right).
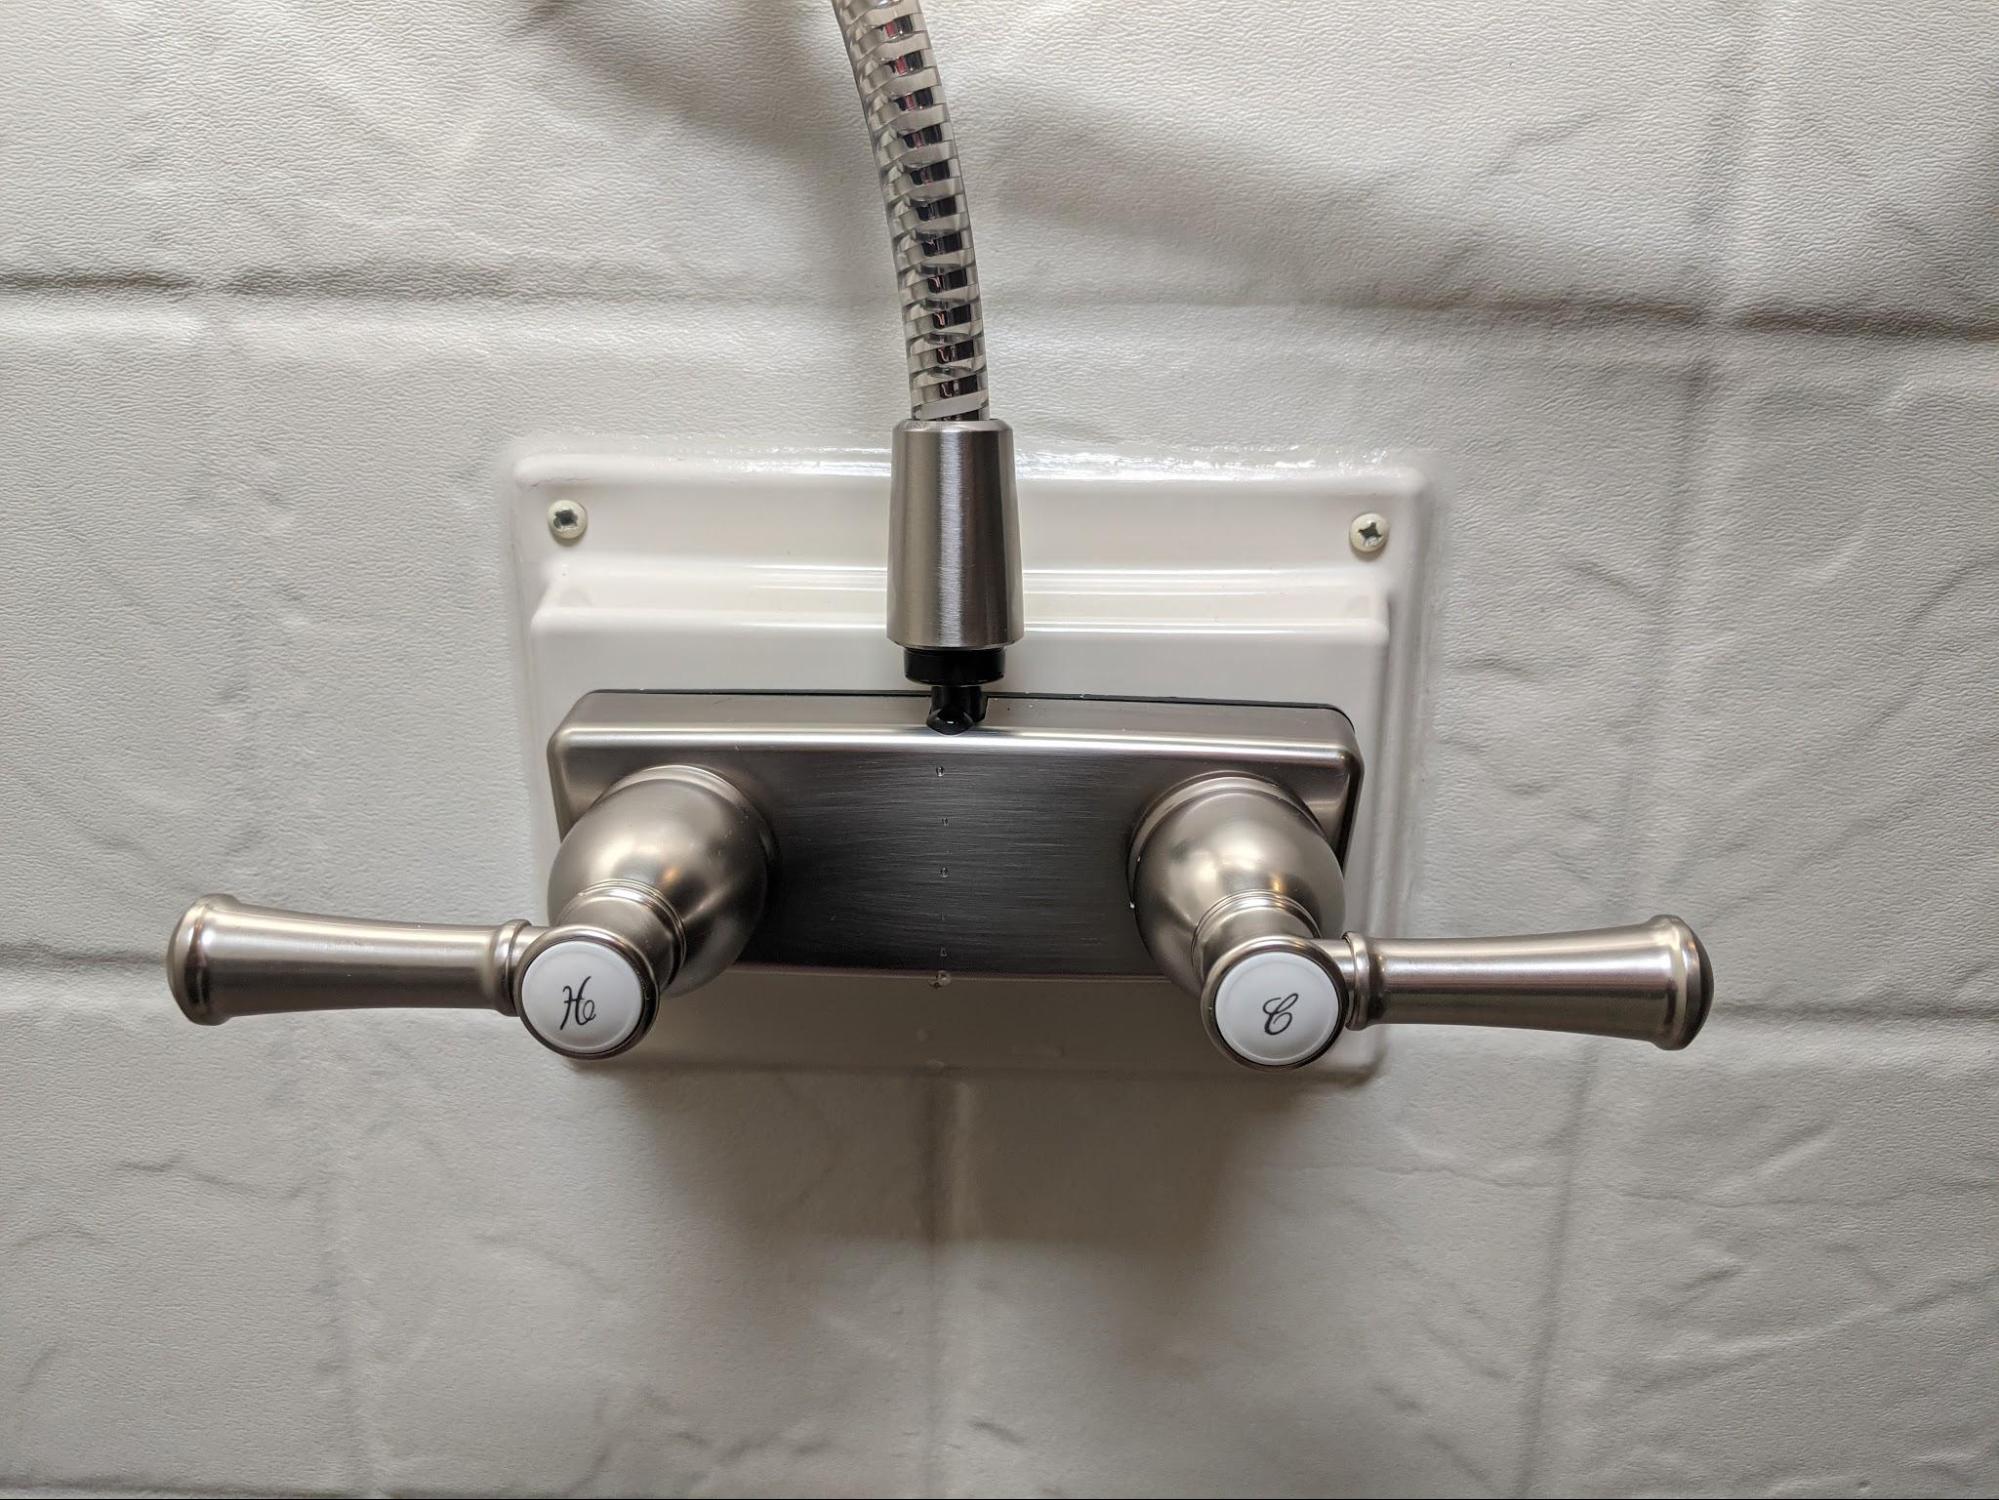
After a little scraping to remove the old caulking and a cleaning to freshen up the mounting bracket, I was able to attach the new faucet onto the mounting bracket and reconnect the water lines. It’s that easy!
Well, almost done. The new shower head had to be connected next, then leak tested, and remounted...keep reading.
How to replace RV shower head
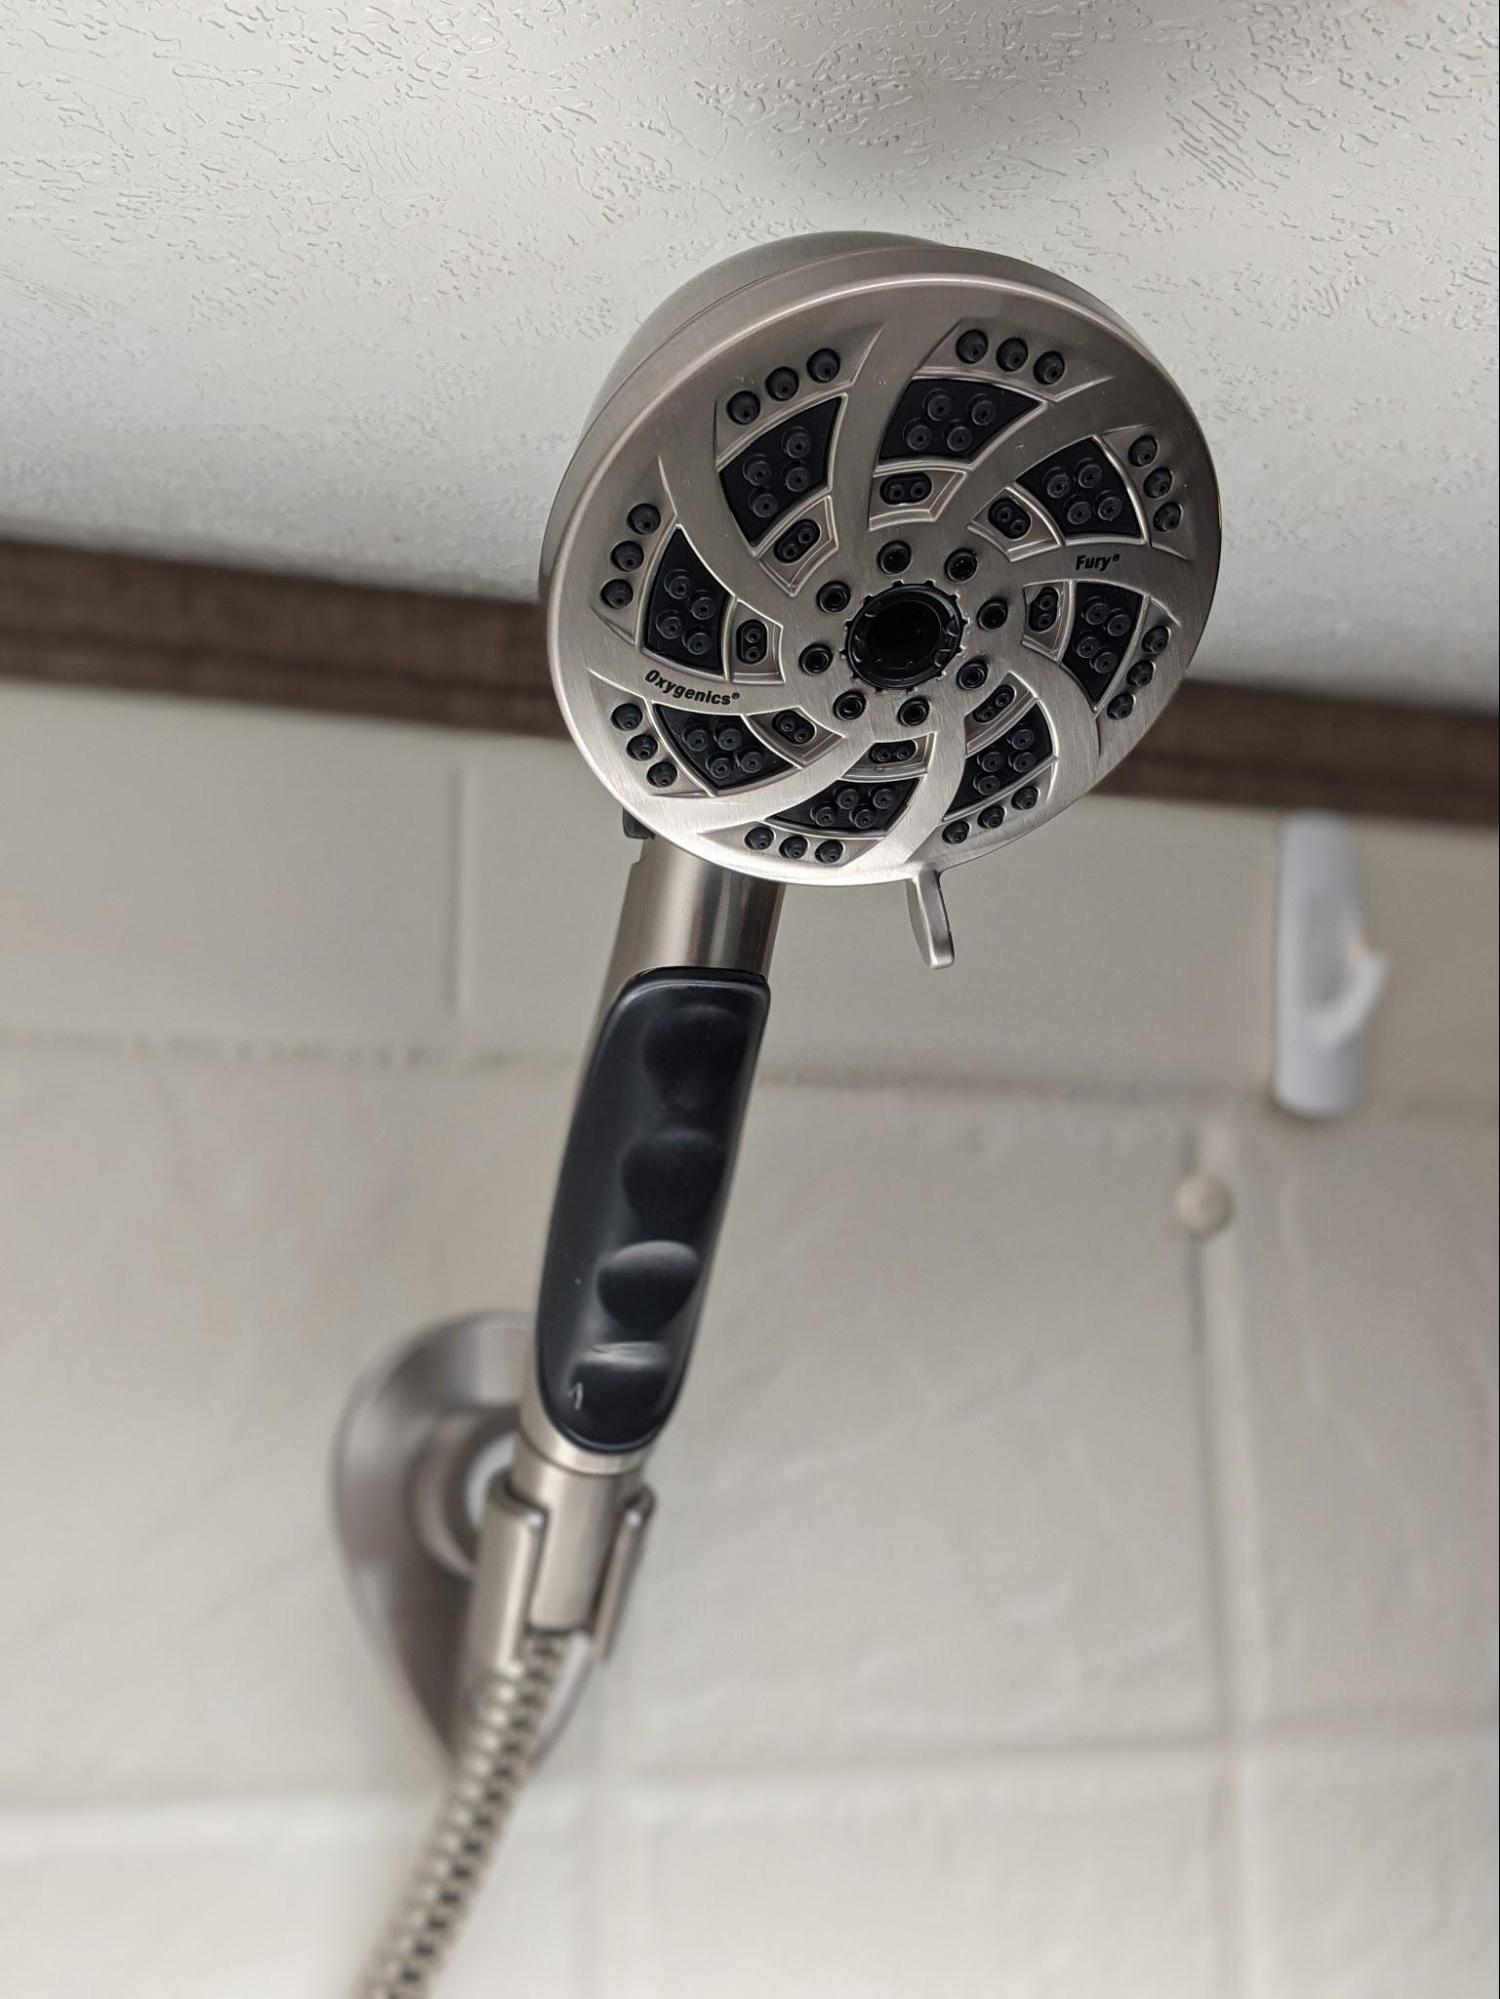
The RV shower head is the easiest part of this project. The new hose connects to the RV shower faucet at one end, feeds through the hose holding bracket, and connects to the shower head at the top. The holding bracket that came with our new shower head had drill holes that were spaced further apart than the old bracket did, so we had to mark the new hole placement with a pencil, fill the old holes with silicone caulk, and redrill the new holes before screwing on the new shower head bracket. The video I had watched suggested sitting the drill bit deeply into the chuck so that you don’t accidentally drill too far through the thin RV walls. It worked great!
After the shower head was in place it was time to do the scariest part - leak testing the system. This is what would tell me if I screwed everything on tight enough and that it was all working. We turned on the water pump and slowly opened the tap and it worked! There was no leaking behind the mounting bracket where the water lines connected and the faucet and shower head were working as they should be. Such a relief!
All that was left was to reattach the mounting bracket to the wall with the four screws I removed at the beginning and to recaulk around the edge of it. After applying the caulk around the edge, I used a wet finger to gently smooth it out and give it a professional finish.
Now we get to head out on a camping trip to put these new parts to the test. We will be sure to report back and give detailed reviews of them once we have.
Thanks for reading and remember to keep on living the life you’ve imagined!
Mel